
Local LLMs for Rain or Shine LLM Poetry App
***If you want to jump straight to the local integration branch, check out the repository here: https://github.com/ndsu-patmcmullen/csci-717-project-weather-llm-poetry/pull/3***
In my last post, we built Rain or Shine, an all ages weather forecasting poet. It worked great, but it relied on a cloud-hosted API (Gemini) to generate the poetry.
While cloud APIs are incredibly convenient, they come with a few trade-offs: API keys, potential costs, and rate limits.
With the latest changes, Rain or Shine's poet will be fully local using LM Studio and a highly capable open-weights model running right on a laptop.
Why Go Local?
Swapping to a local LLM can be cost effective while meeting all of your applications needs. Here is how the local workflow stacks up against the cloud:
| Feature | Cloud LLM (Gemini) | Local LLM (LM Studio) |
|---|---|---|
| Cost | Pay-per-token (or free tier limits) | 100% Free |
| Privacy | Data sent to external servers | Local execution (data never leaves your machine) |
| Internet | Required | Completely Offline |
| Setup | API Key configuration | One-click app download |
The Engine: Picking a Local Model
To run an LLM locally on regular consumer hardware (like a MacBook), we use quantized models. Quantization shrinks the model size so it fits neatly into your system memory (RAM/VRAM) without losing much intelligence.
For this project, I used google/gemma-4-e2b at a 6-bit quantization (which runs around 5.15 GB).
- It is small enough to run fast on Apple Silicon.
- It is smart enough to easily follow creative instructions and maintain a poetic tone.
Note for lighter setups: If you are running on an older machine or just want faster speeds, you can use even smaller models. Options like Qwen 2.5 1.5B or Llama 3 1B / 3B are tiny, use very little RAM, and still write well.
Setting Up LM Studio (The UI Way)
This really is a matter of preference, but for most cases LM Studio makes setting up local LLMs with full features really simple.
Here is exactly how to set it up:
- Download the App: Go to lmstudio.ai and install the desktop app.
- Search for the Model: Click the Magnifying Glass (Search) icon on the left sidebar. Search for
gemma-4(or your model of choice) and download a quantized version (like Q6_K or Q4_K_M). - Open the Local Server Tab: Click the double-headed arrow / server rack icon on the left navigation bar to open the "Local Server" tab.
- Load the Model: In the top dropdown, select the model you just downloaded. It will load directly into your computer's memory.
- Start the Server: Click the green Start Server button.
By default, LM Studio will spin up a local server on http://localhost:1234. It exposes an OpenAI-compatible endpoint, meaning its the same format as standard cloud APIs.
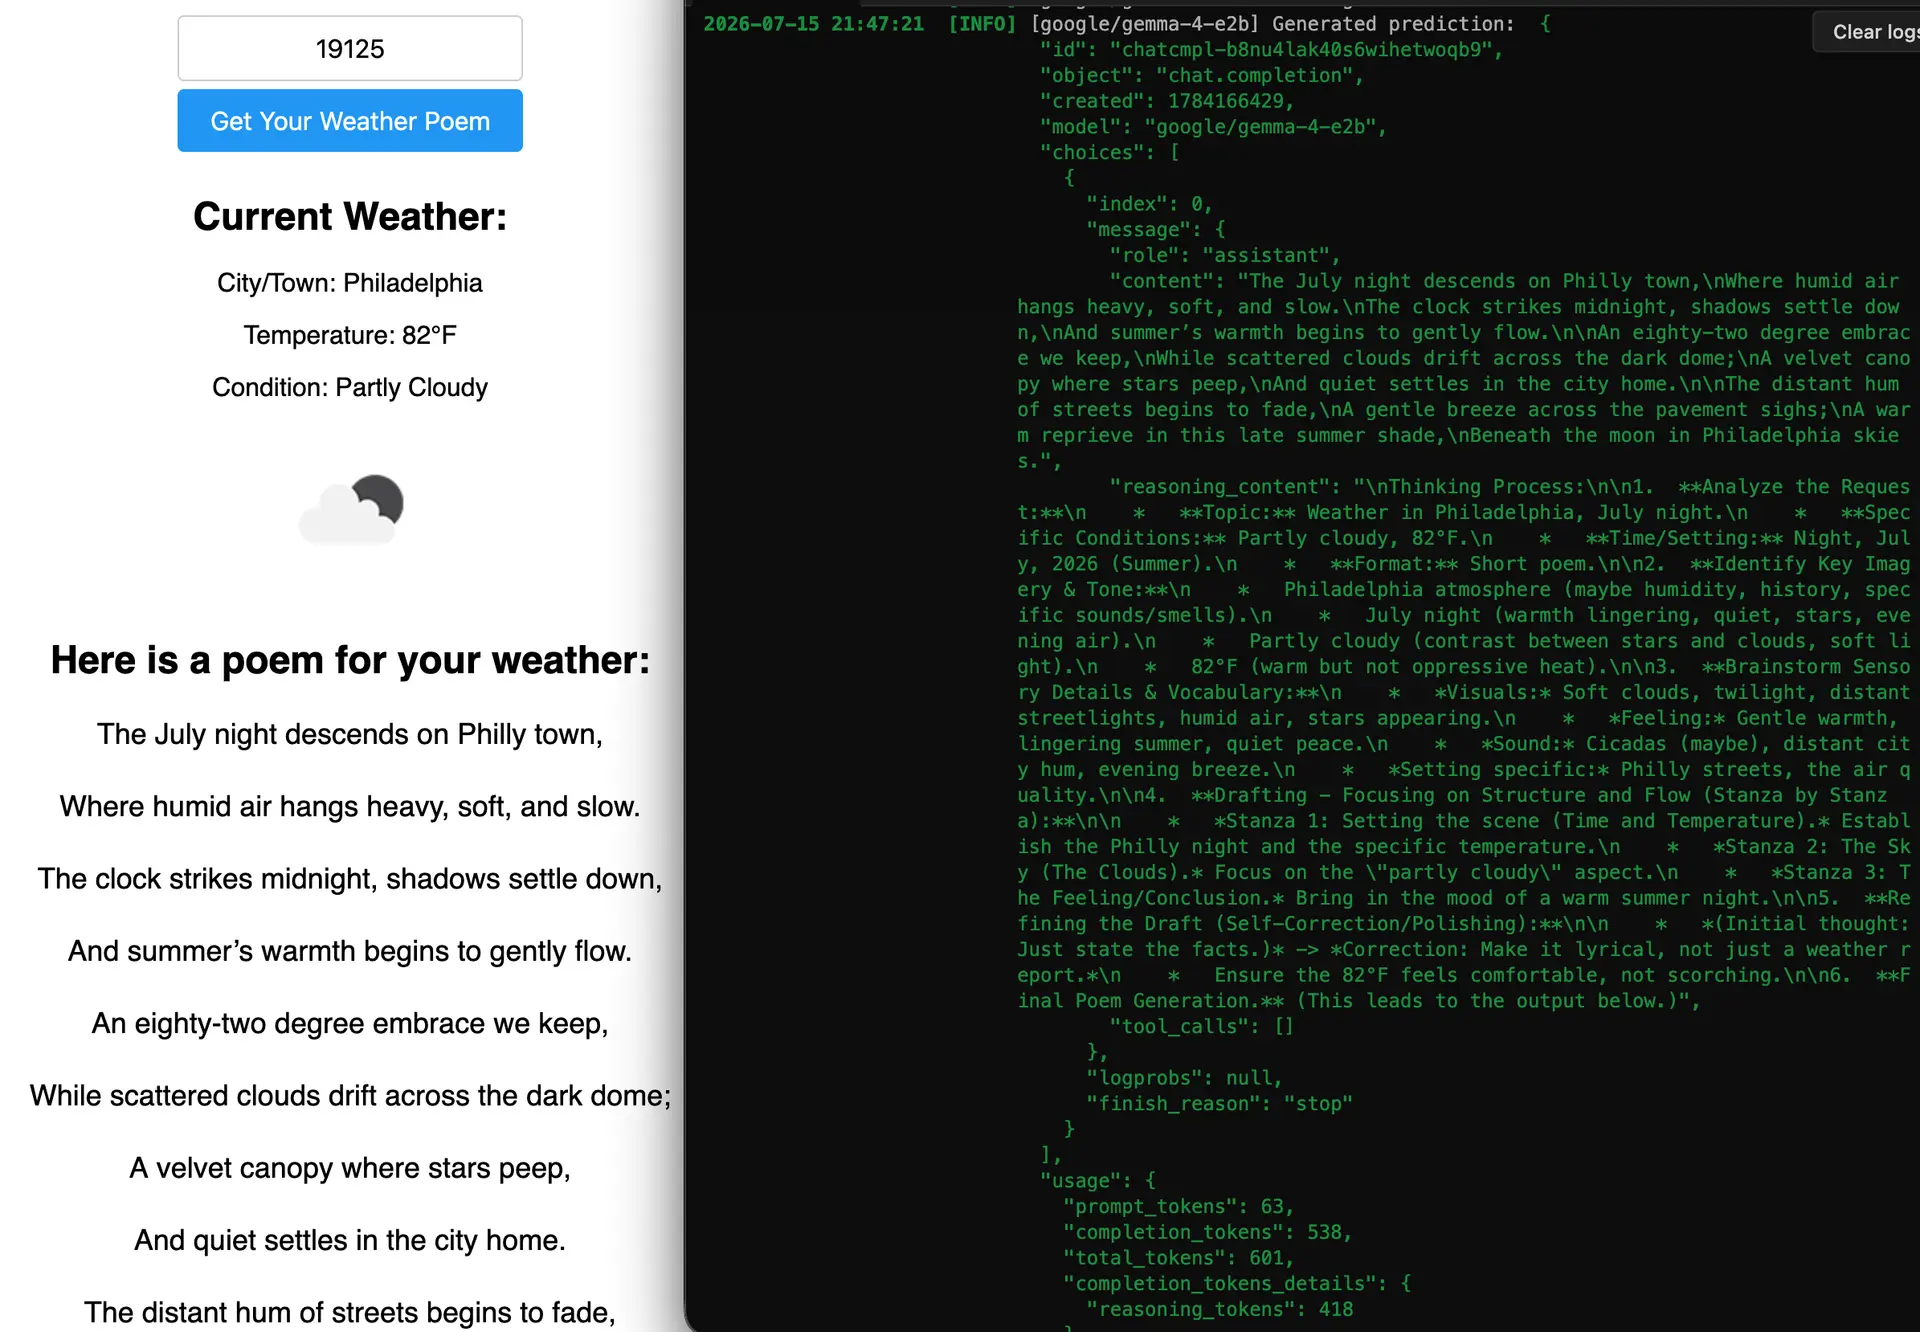 Cool to see the "thinking" in the logs and the final poem
Code Cleanliness Pays Off: The Swap
Because of how the initial codebase was structured, it was simple to expand with a new service
In the first post, we discussed Dependency Injection and interfaces. To make adding additional LLM services easier, a new LlmService interface was created.
export interface LlmService {
  generatePoem(prompt: string): Promise<string>;
}
Then all that was needed was to create a new implementation called LocalLlmService and swap it in.
The core weather services, geocoding logic, and frontend components didn't require any changes. They just talk to the interface, completely unaware of whether the poet behind it is in the cloud or within your own machine!
A Clever Trick: Dynamic Model Detection
Instead of hardcoding the model name in the TypeScript code, LocalLlmService dynamically queries the local server first:
private async getActiveModel(): Promise<string> {
  try {
    const response = await fetch(`${this.baseUrl}/v1/models`);
    if (!response.ok) throw new Error('Local model registry unreachable');

    const data = await response.json();
    return data.data[0]?.id || 'local-model';
  } catch (error) {
    // If the server is up but empty, or offline, we fallback gracefully
    return 'local-model';
  }
}
This means you can swap models inside the LM Studio UI on the fly and the Node backend automatically adjusts to target the currently loaded model without needing a restart.
Wrap-Up
Running your AI stacks locally is really simple. With tools like LM Studio and highly optimized small language models, you can build robust, private, and fast AI integrations right on your local developer environments.
Maybe in the future this could all be hosted on a server and I could dockerize a setup that installs Ollama and downloads a model from Huggingface, but for now I think this does a pretty good job!